Poly Lens Relay Setup
Download the Poly Lens Relay File
The file has the following specifications:
8G RAM
1 CPU core
7Gb (thin provisioned)
100Gb virtual disk (thick provisioned)
Download the File
- Open Poly Lens and login to your Account.
- Select ACCOUNT menu > Manage All Accounts.
- Select the Account to associate the Relay.
- Select Poly Lens Relay from the side menu.
Note: This option will not display if the Account was created with an EU datacenter.
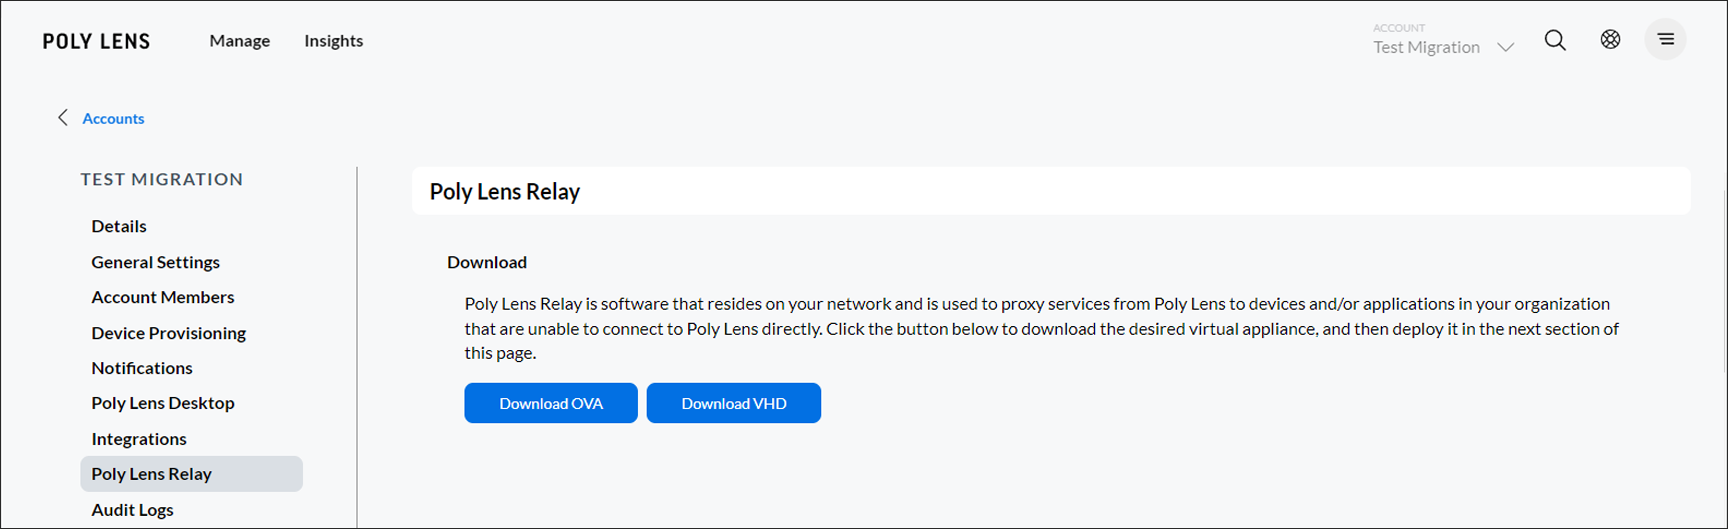
- Select a download option:
Download OVA - An OVA (Open Virtual Appliance) file is a virtual appliance package file that contains files for distribution of software that runs on a virtual machine.
Download VHD - A VHD (Virtual Hard Disk) is an image used by Microsoft Windows Virtual PC, a Windows virtualization program. It stores the contents of a hard disk of a virtual machine (VM), which may include disk partitions, a file system, files, and folders.
Note: This is a large file and may take some time to download. - When the file download is complete, install the Poly Lens Relay.
Install the Poly Lens Relay
The Poly Lens Relay is a virtual machine that resides on your network used to proxy services from the Poly Lens Cloud Service to devices and/or applications in your organization, that are unable to connect to the Poly Lens Cloud Services directly.
Prerequisite
The Poly Lens Relay requires ports to be opened on your firewall to ensure the Relay can reach the Poly Lens Cloud Service. Work with your firewall administrator to ensure Poly Lens Relay connectivity to the Poly Lens Cloud.
Before installing the Poly Lens Relay, you must complete the registration process for the Poly Lens Cloud Service. Contact your Poly account team if you have any questions about the registration process.
Configure System Settings for the Poly Lens Relay
By default, the Poly Lens Relay is configured to support network setup via DHCP. We recommend changing this to static IP addressing and configuring other system settings.
The following settings are required:
- DNS: Your DNS server needs to be able to resolve both external and internal addresses.
- NTP Server: The Poly Lens Relay communicates via APIs that are time-sensitive. Configure the Relay to use one or more NTP servers to ensure it remains in sync.
Procedure
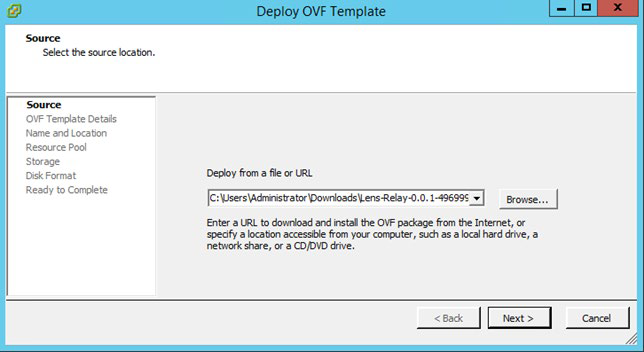
- In your VM environment, power on the recently installed Poly Lens Relay virtual machine.
- Access the VM console.
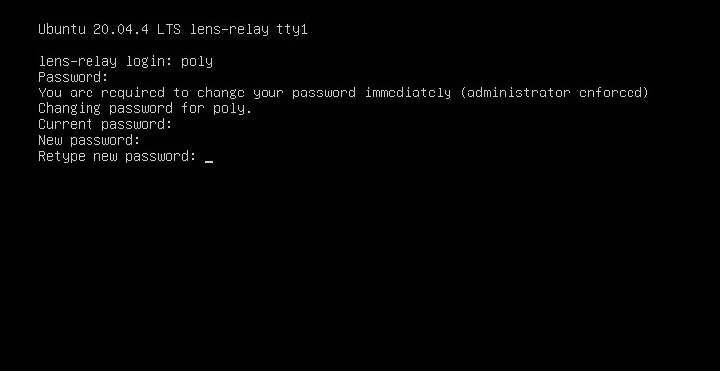
- Click in the console window, press Enter if necessary to see the login prompt, and log in with your User ID and Password. If this is your first time logging in, the default User ID is poly and the Password is Poly12#$. You are prompted to change these upon first login.
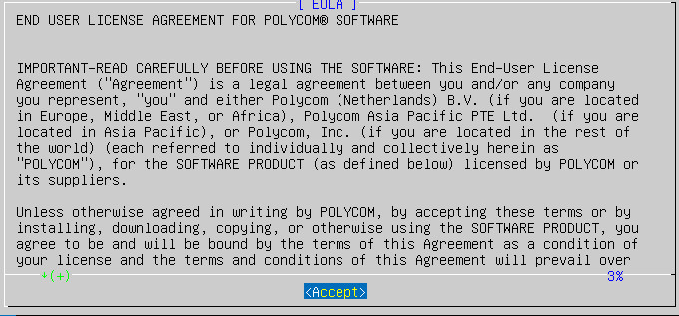
- Read and select Accept for the EULA agreement after logging in with the Poly account credentials:
- Select the Configure System option to configure the Poly Lens Relay system.
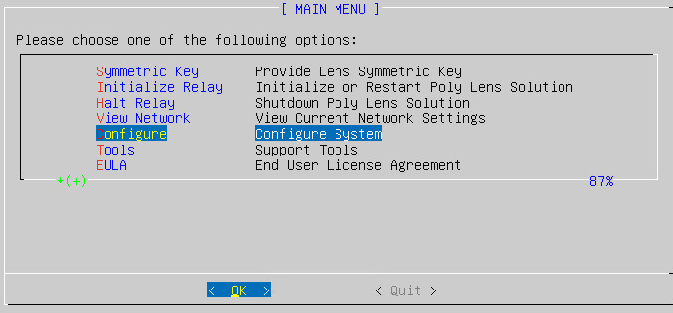
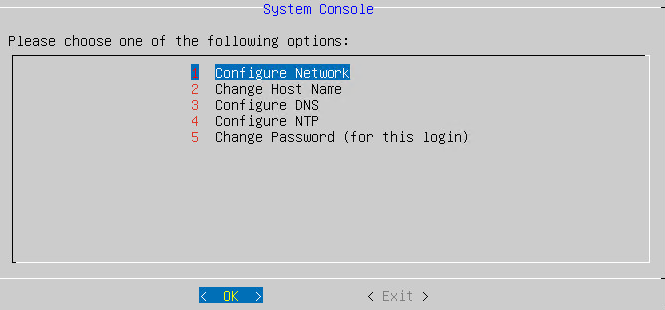
Configure DNS, hostname, network and NTP server settings.
IMPORTANT! DNS is mandatory to complete the configuration and should be configured first.
- If using DHCP, verify that the network settings are correct.
- When adding an NTP server, add one or more NTP servers either by IP or hostname.
- When finished, exit the console.
Test Your Poly Lens Relay Connection
After you install and configure the Poly Lens Relay, test its DPS, new logging, endpoints, etc.
Prerequisite
Before testing your network connection, ensure that you’ve opened all the required ports on your firewall.
Procedure
- In your VM environment, power on the recently installed Poly Lens Relay virtual machine.
- Click in the console window, press Enter if necessary to see the login prompt. Log in with your User ID and Password. If this is your first time logging in, the default User ID is poly and the Password is Poly12#$. You are prompted to change these credentials at this time.
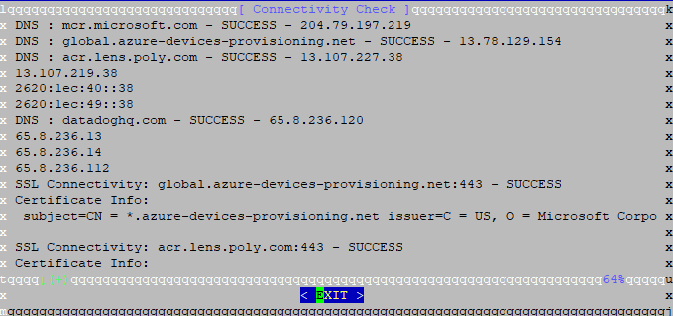
- Select Support Tools.

-
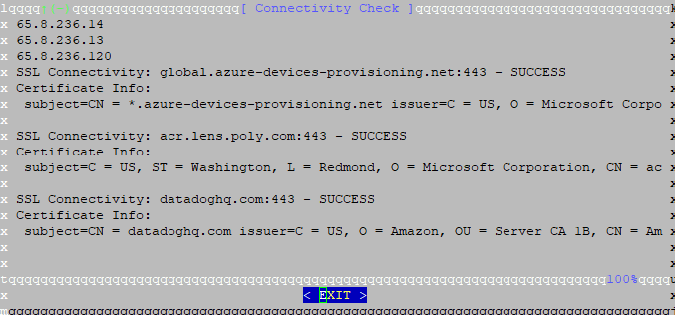
Select Connectivity. The console tests your connectivity to the Poly Lens Cloud Service. It verifies that your Poly Lens Relay can reach the required cloud addresses. The results should look like the following: Note: The IP addresses in the output are from a load-balanced pool of IP addresses and are dynamically updated.
-
Microsoft provides initial guidance on firewall policies for Azure IoT Edge installations.
https://docs.microsoft.com/en-us/azure/iot-edge/production-checklist